How to Switch Git Branches Without Losing Your Uncommitted Changes
Learn how to use git stash effectively to temporarily save uncommitted changes when you need to switch branches without losing your work.
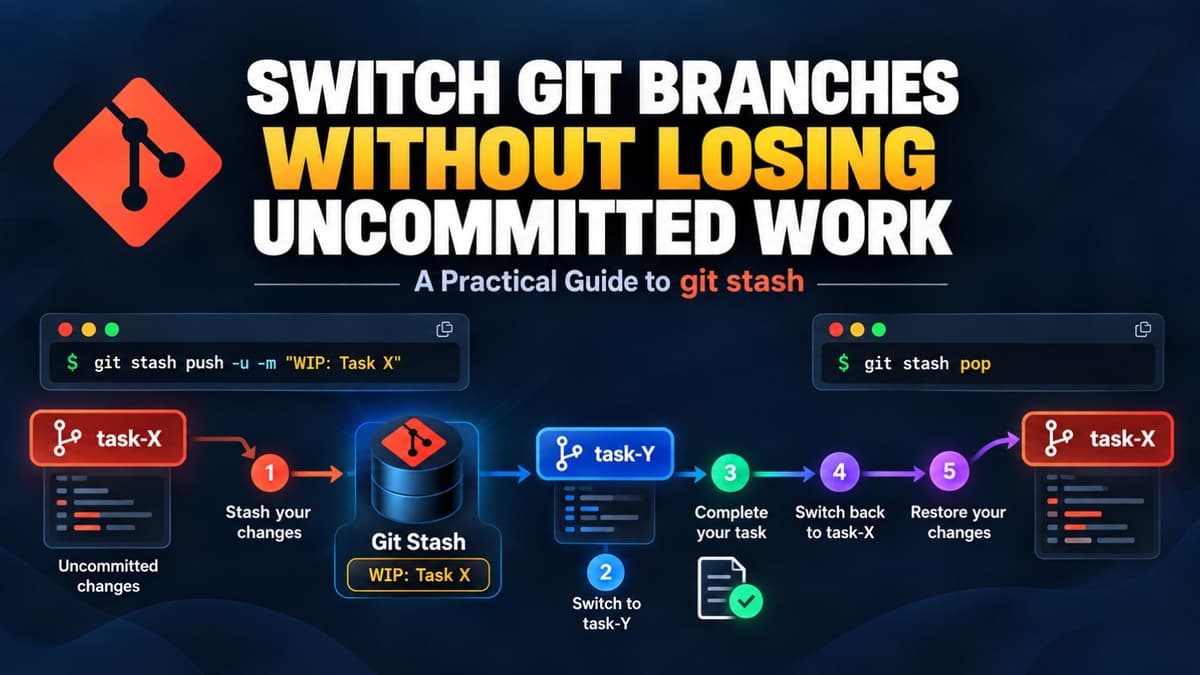
When working with Git, there are times when you're in the middle of a task and have several changes in your working directory, but the task isn't finished yet.
You don't want to commit those changes because the work is incomplete. But suddenly, you need to switch to another branch and work on a different task.
So what do you do?
You can use Git Stash.
The Problem
Suppose you're currently working on:
task-X
You've already written some code:
task-X
 ├── UserService.cs       modified
 ├── UserController.cs    modified
 └── UserDto.cs           new file
But Task X isn't finished yet.
You don't want to create a commit like:
WIP
Temporary changes
Not completed
At the same time, you need to switch to another branch:
task-Y
If you simply run:
git switch task-Y
Git may prevent you from switching, especially if your uncommitted changes would conflict with the target branch.
More importantly, you don't want your unfinished Task X changes to accidentally become part of Task Y.
This is where git stash becomes useful.
What is Git Stash?
git stash temporarily stores your uncommitted changes and gives you a clean working directory.
Think of it as:
"Put my current unfinished work somewhere safe. I'll come back to it later."
Your changes aren't committed to the branch, but Git remembers them so you can restore them later.
The Workflow
Here's the complete workflow:
git switch task-X

git stash push -u -m "WIP: Task X"

git switch task-Y

# Complete the task at Y

git switch task-X

git stash pop
Let's understand each step.
1. Start Working on Task X
First, switch to your task branch:
git switch task-X
Then work normally.
For example:
task-X
 ├── UserService.cs       modified
 ├── UserController.cs    modified
 └── UserDto.cs           new file
Check your changes:
git status
You might see:
Changes not staged for commit:
  modified: UserService.cs
  modified: UserController.cs

Untracked files:
  UserDto.cs
But Task X isn't finished yet.
So you don't want to commit.
2. Stash Your Changes
Run:
git stash push -u -m "WIP: Task X"
The important parts are:
git stash
Tells Git to temporarily store your changes.
-u
Includes untracked files.
This is useful when you've created new files that haven't been added to Git yet.
For example:
UserDto.cs
Without -u, untracked files may not be included in the stash.
-m "WIP: Task X"
Adds a meaningful description to your stash.
Instead of seeing:
stash@{0}: WIP on task-X
you'll have something more descriptive:
stash@{0}: On task-X: WIP: Task X
3. Your Working Directory Is Now Clean
After stashing:
git status
You should see something like:
On branch task-X
nothing to commit, working tree clean
Your changes haven't disappeared.
They are safely stored in Git's stash.
You can verify them with:
git stash list
Example:
stash@{0}: On task-X: WIP: Task X
4. Switch to Task Y
Now you can safely switch:
git switch task-Y
Your unfinished Task X changes won't be carried into Task Y.
You can now work on Task Y normally:
# Work on Task Y

git add .

git commit -m "Complete Task Y"
5. Return to Task X
After finishing Task Y, switch back:
git switch task-X
Your previous Task X changes are still stored in the stash.
Check:
git stash list
You'll see:
stash@{0}: On task-X: WIP: Task X
6. Restore Your Task X Changes
Now run:
git stash pop
Git will restore the changes you previously stashed.
Your working directory should now look like it did before you switched to Task Y.
For example:
task-X
 ├── UserService.cs       modified
 ├── UserController.cs    modified
 └── UserDto.cs           new file
You can now continue working on Task X.
Complete Example
Here's the complete workflow in one place:
# Start working on Task X
git switch task-X

# Work on Task X...
# Some changes are still unfinished

# Temporarily save unfinished changes
git stash push -u -m "WIP: Task X"

# Switch to another task
git switch task-Y

# Work on Task Y...
# Complete Task Y

git add .
git commit -m "Complete Task Y"

# Return to Task X
git switch task-X

# Restore unfinished Task X work
git stash pop

# Continue working on Task X
What Happens Behind the Scenes?
Before stashing:
task-X
   │
   ├── modified files
   ├── new files
   └── unfinished work
After:
git stash push -u -m "WIP: Task X"
Git temporarily stores the changes:
Git Stash
   │
   └── WIP: Task X
Your working directory becomes clean:
task-X
   │
   └── clean working directory
Then you can switch:
task-X ────────────────┐
                       │
                       ▼
                    task-Y
                       │
                  complete work
                       │
                       ▼
                    task-X
                       │
                       ▼
                  git stash pop
                       │
                       ▼
              unfinished work restored
What If I Have Multiple Stashes?
You can have multiple stash entries.
For example:
git stash list
might show:
stash@{0}: On task-Z: WIP: Task Z
stash@{1}: On task-X: WIP: Task X
stash@{2}: On task-A: WIP: Task A
You can inspect a stash with:
git stash show stash@{0}
Or with more details:
git stash show -p stash@{0}
If you specifically want to restore Task X:
git stash pop stash@{1}
So don't always assume that stash@{0} is the stash you want.
git stash pop vs git stash apply
There are two commonly used commands:
git stash pop
and:
git stash apply
The difference is important.
git stash pop
Restores the changes and removes the stash if the operation succeeds.
git stash pop
git stash apply
Restores the changes but keeps the stash.
git stash apply
For normal temporary work, I usually use:
git stash pop
because once I've successfully restored the changes, I don't need the stash anymore.
If you're being cautious or want to keep a backup, use:
git stash apply
A Practical Branching Strategy
If your team uses a structure like:
development
    │
    └── feature/dabananda
            │
            ├── task-X
            ├── task-Y
            └── task-Z
You can work like this:
development
      │
      ▼
feature/dabananda
      │
      ├── task-X
      │      │
      │      ├── work
      │      ├── stash
      │      └── temporarily leave
      │
      ├── task-Y
      │      │
      │      ├── work
      │      └── complete
      │
      └── task-X
             │
             ├── stash pop
             ├── continue work
             └── complete
This allows you to switch between tasks without creating meaningless commits just to save unfinished work.
One Important Tip
Before switching branches, make sure you know what you're stashing.
Run:
git status
Then:
git stash push -u -m "WIP: Task X"
And verify:
git stash list
This makes it much easier to understand what Git has stored.
Final Cheat Sheet
When you need to leave an unfinished task:
git stash push -u -m "WIP: Task X"
Switch to another task:
git switch task-Y
Finish Task Y:
git add .
git commit -m "Complete Task Y"
Return to Task X:
git switch task-X
Restore your unfinished work:
git stash pop
That's it.
You don't need to create a temporary commit just because you need to switch branches.
git stash is designed exactly for this kind of situation.
Share this article

Dabananda Mitra
Software Engineer specializing in scalable backend systems and minimal, effective API design.
Comments
Loading comments...
More Writings
How to Kill a Process Using Port in Windows: Complete Guide
Learn how to find and kill a process using a specific port in Windows with netstat, tasklist, and taskkill commands. A practical guide for .NET and ASP.NET Core developers.
Read Article →.NETTop 500 .NET Interview Questions | Complete Preparation Guide
Preparing for a .NET developer interview? I collected 500 unique interview questions covering the most important areas of the .NET ecosystem. This is a useful revision resource for freshers and experienced .NET developers preparing for technical interviews. Save it, practice the questions category by category, and use it as a structured roadmap for your .NET interview preparation.
Read Article →.NETProject Template: ASP.NET Core Web Api Modular Monolith
Tired of doing the starting configuration again and again for new projects? Here is the solution. Use this Modular Monolith ASP.NET Core Web Api starting template and directly jump into main code.
Read Article →